Dooomspeaker (talk | contribs) No edit summary |
Sirtimmothybrentwood (talk | contribs) m (Undo revision 16509 by 75.85.160.74 (talk)) Tag: Undo |
||
| (45 intermediate revisions by 20 users not shown) | |||
| Line 1: | Line 1: | ||
| + | {{RebirthWiki}} |
||
| − | '''Bosses''' are strong monsters found in [[Boss Room|boss rooms]] at the end of a floor. The boss at the end of the floor must be defeated |
+ | '''Bosses''' are strong monsters found in [[boir:Boss Room|boss rooms]] at the end of a floor. The boss at the end of the floor must be defeated to advance to the next floor. The boss for a particular floor is chosen from the pool of bosses for the [[Chapters|environment]] of the floor. Upon defeat, most bosses will drop an item from the boss [[boir:Item Pool|item pool]]. |
| + | ''Antibirth'' adds 16 new bosses and a few variants on existing bosses. |
||
| − | Bosses boast additional resistances to status effects. For example, [[Effects#Fear Tears|fear]] occurs less often and the [[Night Light]] is unable to slow them down. |
||
| ⚫ | |||
| − | Additionally, some floors may spawn a room with a [[Bosses#All_Mini-Bosses|Mini-Boss]]. |
||
| ⚫ | |||
| − | {{clear}} |
||
| − | |||
| ⚫ | |||
| ⚫ | |||
{| style="width:70%; align:left padding-right:2em" |
{| style="width:70%; align:left padding-right:2em" |
||
| − | | style="text-align: center;" |[[File: |
+ | | style="text-align: center;" | [[File:Boss_Baby_Plum.png|link=Baby Plum]] |
|- |
|- |
||
| ⚫ | |||
| − | |||
| − | | style="text-align: center;" |[[Larry Jr.]] |
||
|} |
|} |
||
| − | === |
+ | === Chapter 3 === |
{| style="width:70%; align:left padding-right:2em" |
{| style="width:70%; align:left padding-right:2em" |
||
| − | | style="text-align: center;" |[[File: |
+ | | style="text-align: center;" | [[File:Boss_The_Pile.png|link=The Pile]] |
| − | | style="text-align: center;" |[[File: |
+ | | style="text-align: center;" | [[File:Boss_Reap_Creep.png|link=Reap Creep]] |
| − | | style="text-align: center;" |[[File:Boss_Larry Jr..png|center|link=Larry Jr.]] |
||
|- |
|- |
||
| − | | style="text-align: center;" |[[ |
+ | | style="text-align: center;" | [[The Pile]] |
| − | | style="text-align: center;" |[[ |
+ | | style="text-align: center;" | [[Reap Creep]] |
| − | | style="text-align: center;" |[[Larry Jr.]] |
||
| − | |} |
||
| − | {| style="width:70%; align:left padding-right:2em" |
||
| − | | style="text-align: center;" |[[File:Boss_Dingle.png|center|link=Dingle]] |
||
| − | | style="text-align: center;" |[[File:Boss_Gurglings.png|center|link=Gurglings]] |
||
| − | | style="text-align: center;" |[[File:Boss_Steven.png|link=Steven]] |
||
| − | |- |
||
| − | | style="text-align: center;" |[[Dingle]] |
||
| − | | style="text-align: center;" |[[Gurglings]] |
||
| − | | style="text-align: center;" |[[Steven]] |
||
|} |
|} |
||
| ⚫ | |||
| − | =Chapter 2= |
||
| + | {{DownpourBosses}} |
||
| ⚫ | |||
| − | {| style="width:70%; align:left padding-right:2em" |
||
| − | | style="text-align: center;" |[[File:Boss_Chub.png|center|link=Chub]] |
||
| − | | style="text-align: center;" |[[File:Boss_Gurdy.png|center|link=Gurdy]] |
||
| − | | style="text-align: center;" |[[File:Boss_Mega_Maw.png|center|link=Mega Maw]] |
||
| − | |- |
||
| − | | style="text-align: center;" |[[Chub]] |
||
| − | | style="text-align: center;" |[[Gurdy]] |
||
| ⚫ | |||
| − | |} |
||
| ⚫ | |||
| − | =Chapter 3= |
||
| + | {{MinesBosses}} |
||
| − | ===Floor 1=== |
||
| − | ===Normal Chapters=== |
||
| − | {| style="width:70%; align:left padding-right:2em" |
||
| − | | style="text-align: center;" |[[File:Boss_Monstro.png|link=Monstro]] |
||
| − | | style="text-align: center;" |[[File:Boss_Gemini.png|link=Gemini]] |
||
| − | | style="text-align: center;" |[[File:Boss_Larry Jr..png|center|link=Larry Jr.]] |
||
| − | |- |
||
| − | | style="text-align: center;" |[[Monstro]] |
||
| − | | style="text-align: center;" |[[Gemini]] |
||
| − | | style="text-align: center;" |[[Larry Jr.]] |
||
| − | |} |
||
| − | {| style="width:70%; align:left padding-right:2em" |
||
| − | | style="text-align: center;" |[[File:Boss_Dingle.png|center|link=Dingle]] |
||
| − | | style="text-align: center;" |[[File:Boss_Gurglings.png|center|link=Gurglings]] |
||
| − | | style="text-align: center;" |[[File:Boss_Steven.png|link=Steven]] |
||
| − | |- |
||
| − | | style="text-align: center;" |[[Dingle]] |
||
| − | | style="text-align: center;" |[[Gurglings]] |
||
| − | | style="text-align: center;" |[[Steven]] |
||
| − | |} |
||
| − | == |
+ | == [[Mausoleum]] == |
| + | {{MausoleumBosses}} |
||
| − | {| style="width:70%; align:left padding-right:2em" |
||
| − | | style="text-align: center;" |[[File:Boss_The_Cage.png|center|link=The Cage]] |
||
| − | | style="text-align: center;" |[[File:Boss_Monstro_II.png|center|link=Monstro II]] |
||
| − | | style="text-align: center;" |[[File:Boss_The_Gate.png|center|link=The Gate]] |
||
| − | | style="text-align: center;" |[[File:Boss_Gish.png|center|link=Gish]] |
||
| − | |- |
||
| − | | style="text-align: center;" |[[The Cage]] |
||
| − | | style="text-align: center;" |[[Monstro II]] |
||
| − | | style="text-align: center;" |[[The Gate]] |
||
| − | | style="text-align: center;" |[[Gish]] |
||
| − | |} |
||
| + | == [[Corpse]] == |
||
| + | {{CorpseBosses}} |
||
| − | == |
+ | == Universal == |
| + | These bosses have a chance of replacing a boss from an environment pool, including Antibirth floors. |
||
| − | ===The Depths, Necropolis and Dank Depths=== |
||
| − | {| style="width:70%; align:left padding-right:2em" |
||
| − | | style="text-align: center;" |[[File:Boss_Mom.png|center|link=Mom]] |
||
| − | |- |
||
| − | | style="text-align: center;" |[[Mom]] |
||
| − | |} |
||
| − | |||
| − | =Chapter 4= |
||
| − | ===Floor 1=== |
||
| ⚫ | |||
| − | {| style="width:70%; align:left padding-right:2em" |
||
| − | | style="text-align: center;" |[[File:Boss_Mr._Fred.png|center|link=Mr. Fred]] |
||
| − | | style="text-align: center;" |[[File:Boss_Scolex.png|center|link=Scolex]] |
||
| − | |- |
||
| − | | style="text-align: center;" |[[Mr. Fred]] |
||
| − | | style="text-align: center;" |[[Scolex]] |
||
| − | |} |
||
| − | |||
| − | ===Floor 2=== |
||
| − | ===The Womb, Utero and [[Scarred Womb]]=== |
||
{| style="width:70%; align:left padding-right:2em" |
{| style="width:70%; align:left padding-right:2em" |
||
| − | | style="text-align: center;" |[[File: |
+ | | style="text-align: center; border: none" |[[File:Boss_The_Fallen.png|center|link=The Fallen]] |
| − | | style="text-align: center;" |[[File:Boss_It_Lives.png|center|link=It Lives]] |
||
|- |
|- |
||
| − | | style="text-align: center;" |[[ |
+ | | style="text-align: center; border: none" |[[boir:The Fallen|The Fallen]] |
| − | | style="text-align: center;" |[[It Lives]] |
||
|} |
|} |
||
| + | {{BossNav}} |
||
{{MasterNav}} |
{{MasterNav}} |
||
| − | [[Category: |
+ | [[Category:The Binding of Isaac: Antibirth]] |
| − | [[fr:Boss]] |
||
Latest revision as of 21:03, 10 March 2021
Bosses are strong monsters found in boss rooms at the end of a floor. The boss at the end of the floor must be defeated to advance to the next floor. The boss for a particular floor is chosen from the pool of bosses for the environment of the floor. Upon defeat, most bosses will drop an item from the boss item pool.
Antibirth adds 16 new bosses and a few variants on existing bosses.
Normal Chapters[ | ]
Chapter 1[ | ]

|
| Baby Plum |
Chapter 3[ | ]
|

|
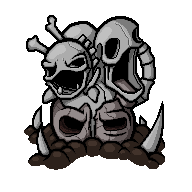
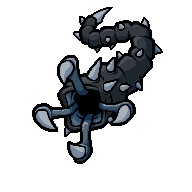
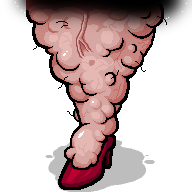
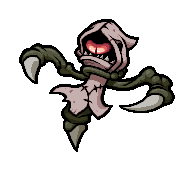
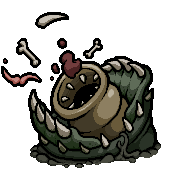
| The Pile | Reap Creep |
Downpour[ | ]
|

|
 |
 |
| Wormwood | Beelzeblub | The Rainmaker | The Haunt |
Mines[ | ]
 |
 |
 |
|
| Tuff Twins | Great Gideon | Hornfel | Reap Creep |
Mausoleum[ | ]
Floor 1[]
 |
 |
 |
|
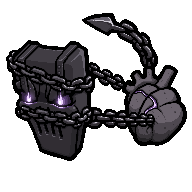
| The Heretic | The Visage | The Siren | The Pile |
Floor 2[]
 |
| Mausoleum Mom |
Corpse[ | ]
Floor 1[]
 |
 |
 |
| The Scourge | Rotgut | Chimera |
Floor 2[]
 |
| The Witness |
Universal[ | ]
These bosses have a chance of replacing a boss from an environment pool, including Antibirth floors.
 |
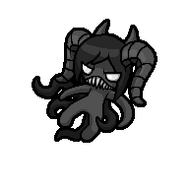
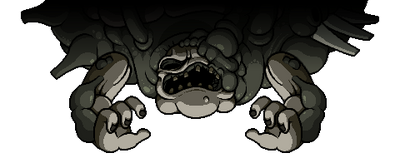
| The Fallen |